Soccer Robot v0.1
I am happy to introduce my new project “Soccer Robot” that you can build from material found within your home!
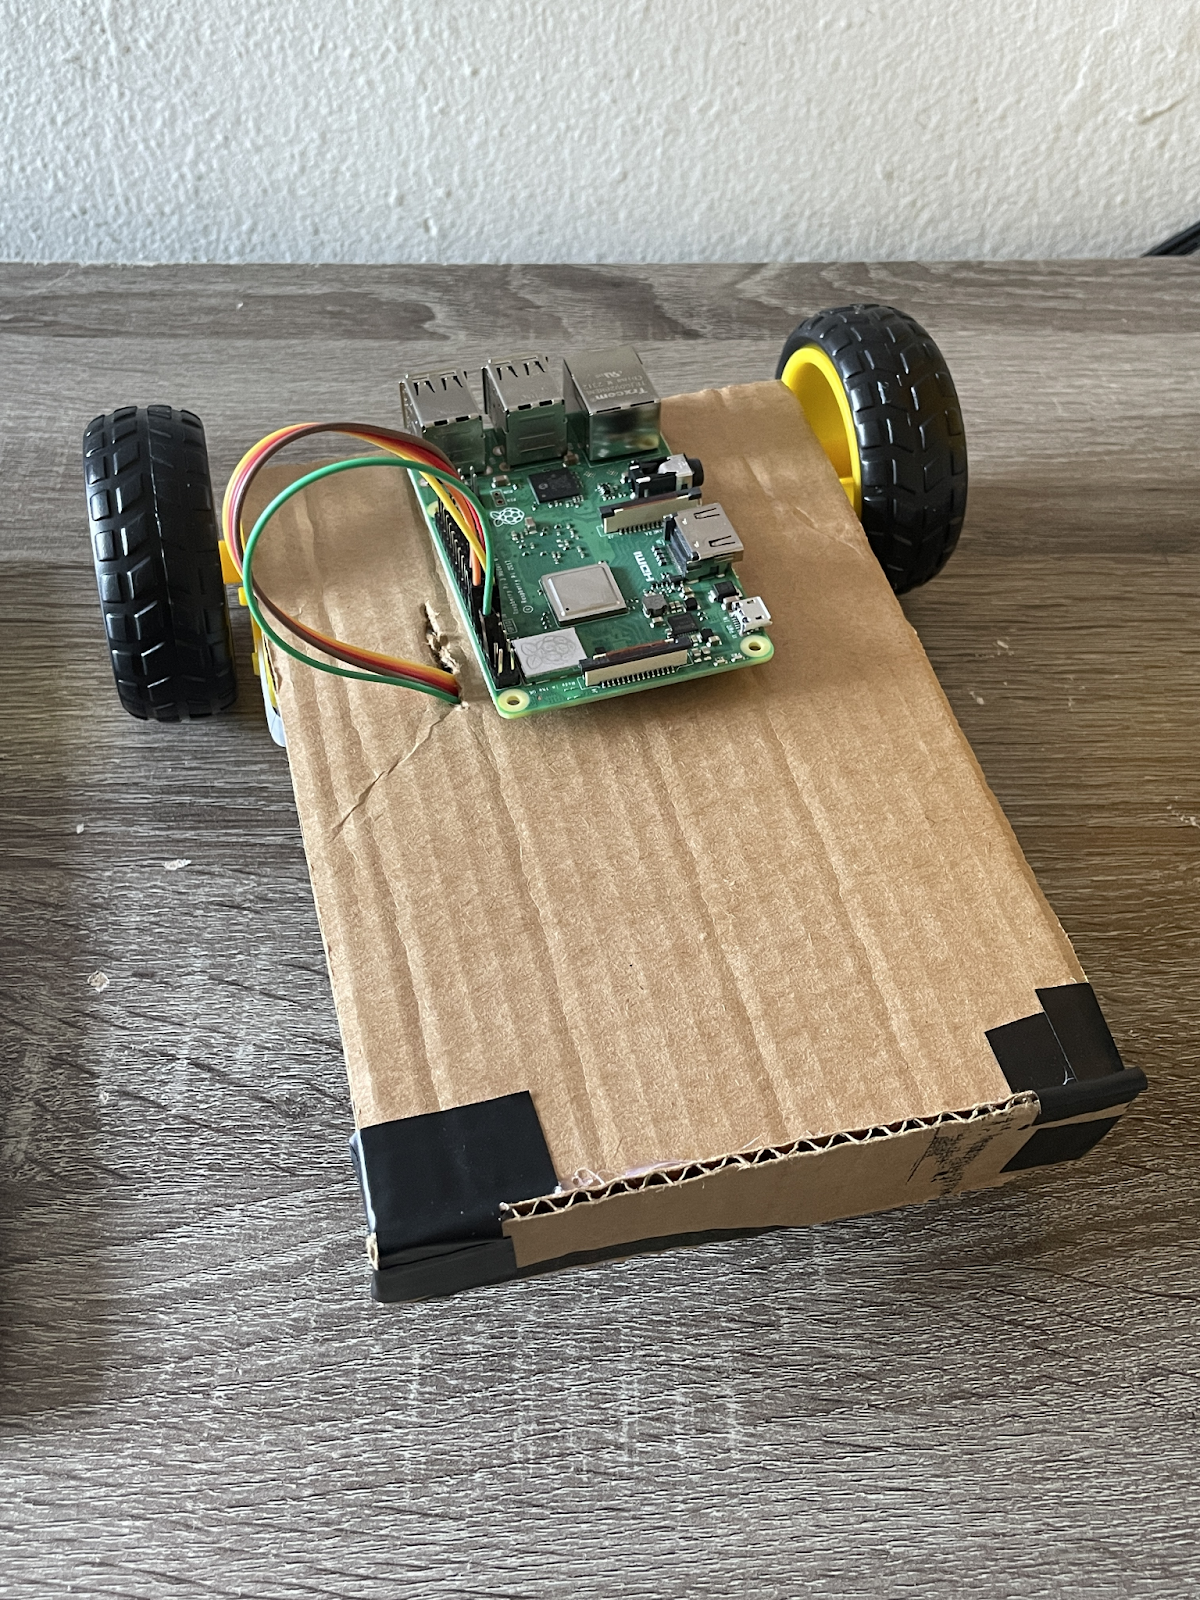
Let’s get started with some crafting. Find some carton boards from your old Amazon Package. Cut it into 3 separate rectangles with the following size: 12x18cm (A), 12x4cm (B), and 12x4cm (C).
Piece A is the main chassis for our robot, while piece B serves as the front ball blockade. For piece C, fold it 3 times to get a rectangular shape of 4x4cm, this is to balance the universal wheel with the 2 motor wheels. Then use glue to attach the 3 pieces together to get the complete robot.
Now, it’s time to prepare the hardware components. You can get all these components for less than $100:
- 1 L298N H-bridge
- 2 Motors
- 2 Motors Wheels
- 1 Universal Wheel
- 1 Raspberry Pi
- 1 Camera Module
- 2 9V Batteries
- 5V Power Bank
- 8 GB MicroSD Card
- Wire
Attached the wheels to the chassis with zip tie and glue. In the meantime, plan out the wiring similar to this diagram:
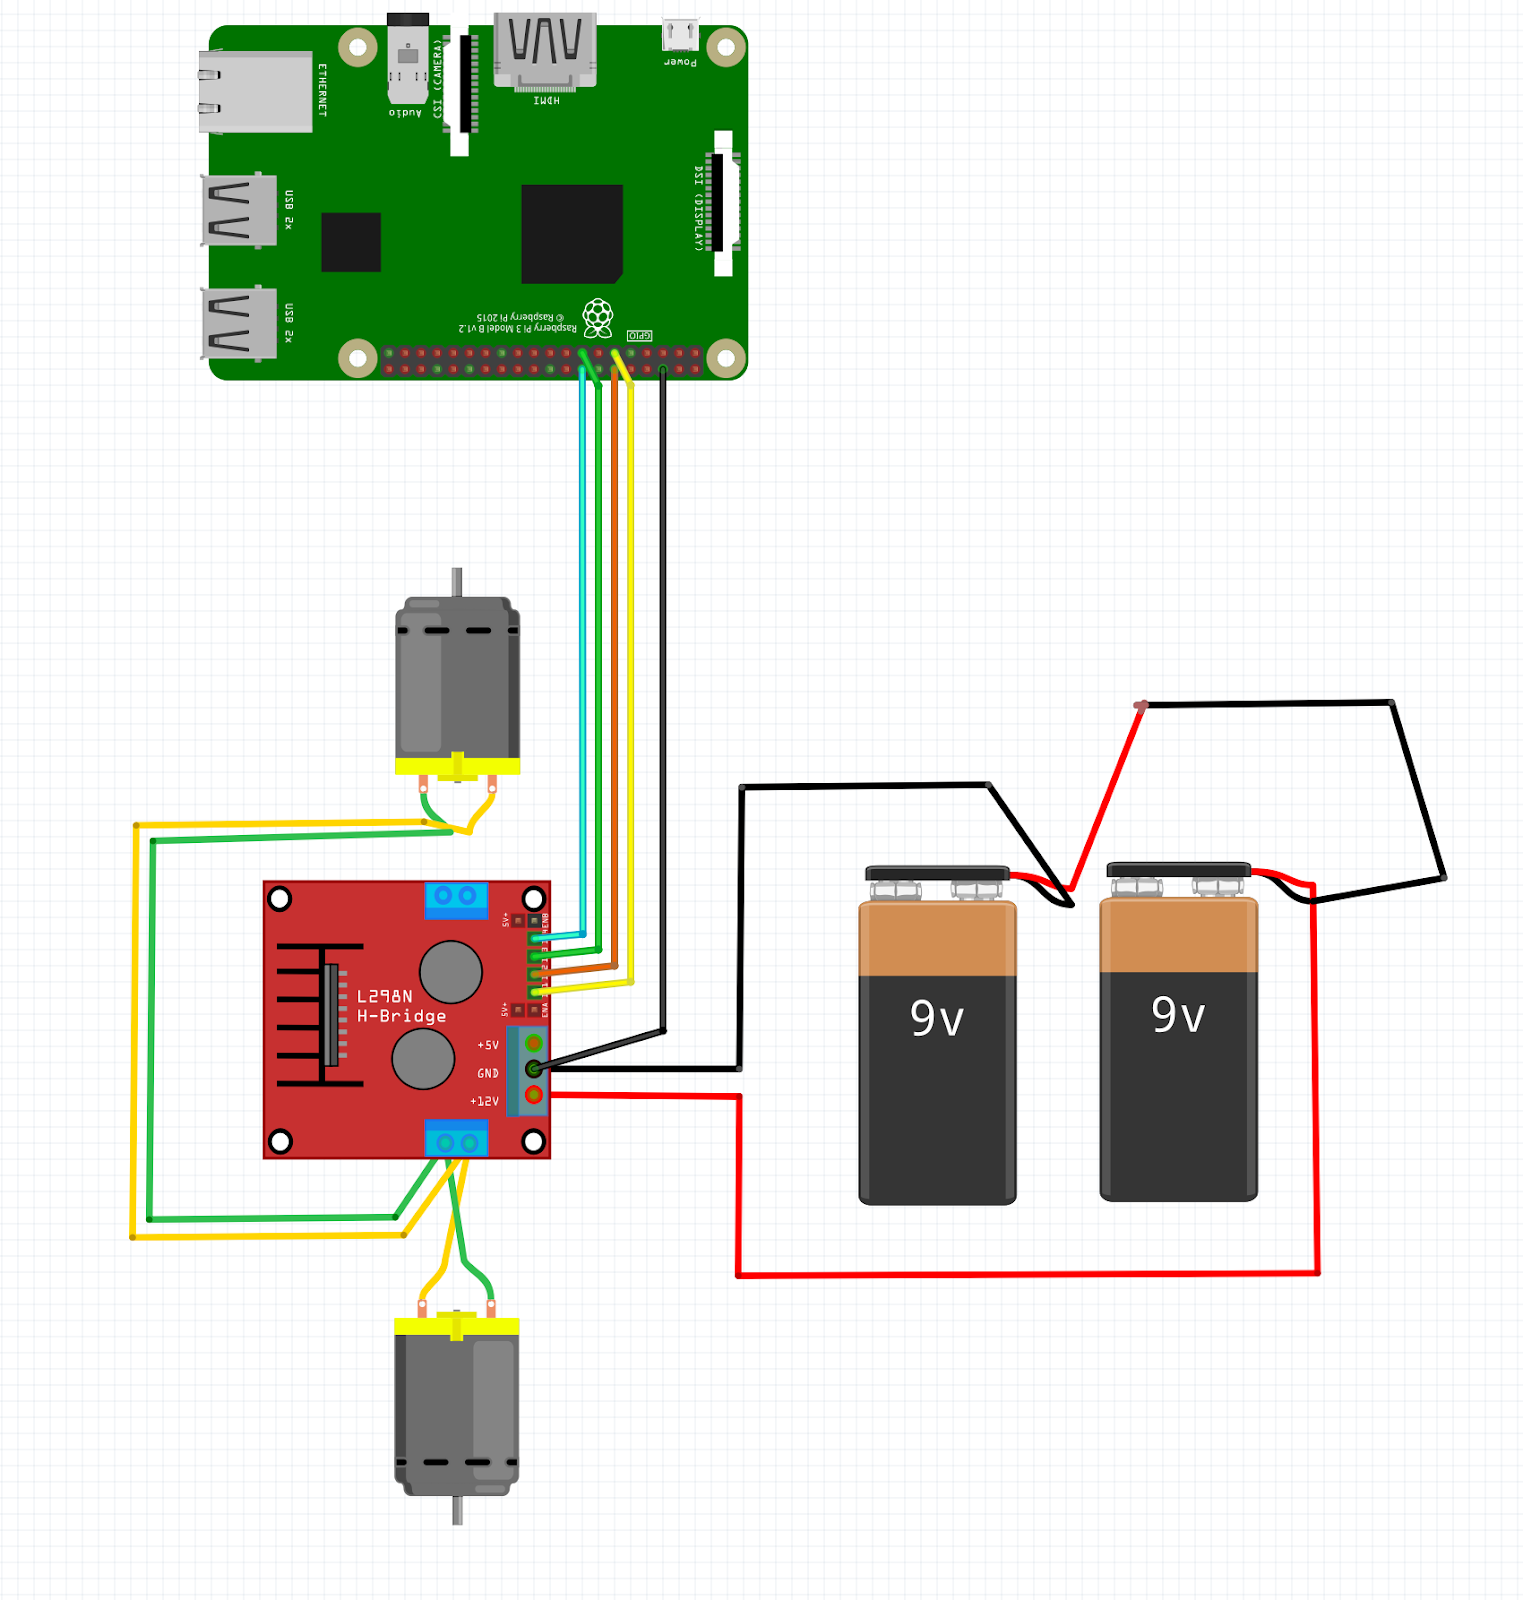
The default PINs on Raspberry Pi for controlling wheels are 18 & 17 for left wheel and 23 & 22 for right wheel.
For the development process, you first need to get the Raspberry Pi Imager from the official website.
Then install the OS into the MicroSD using Raspberry Pi Imager. When the OS is ready, eject the MicroSD from your computer and insert it into the Pi.
Power the Raspberry Pi with the power bank and connect it to your monitor, keyboard, and mouse. Copy the code from this Github Repository to Raspberry Pi.
Now your Pi is ready to go!
Lastly, install the Raspberry Pi to your robot chassis, run the install script, and enjoy the robot moving around!