Release Notes for CrossCompute Analytics SDK 0.9.4
Here are our design priorities:
- Simplify the process for turning a script into an app
- Minimize bandwidth to support slow connections
Bundle Install
You can now install all related packages using a single convenience bundle named crosscompute-analytics. Please note that the package is only compatible with POSIX operating systems like Fedora Linux or Ubuntu or Debian; Windows and Mac OS X are not supported at this time.
pip install crosscompute-analytics
This includes all of our latest analytics automation packages as well as a few other packages that we use fairly often during development:
- crosscompute
- crosscompute-views-map
- crosscompute-views-barcode
- crosscompute-printers-pdf
- jupyterlab-crosscompute
- jupyterlab
- ipython
- pudb
To generate PDF reports, you will need to run additional steps as described in the crosscompute-printers-pdf README.
There are also several other packages in PyPI that correspond to a legacy version of CrossCompute. Don’t use these legacy packages. We hope the simplified bundle installation will make it clear which packages are in the latest version of our system.
As of today, the documentation on docs.crosscompute.com is very out of date. We hope to have the documentation updated by the end of September 2023.
For now, your best source of documentation is the automation configuration template and this forum.
---
# Examples: https://github.com/crosscompute/crosscompute-examples
# Documentation: https://docs.crosscompute.com
# Forum: https://forum.crosscompute.com
# Gallery: https://crosscompute.net

# crosscompute version determines how this file is interpreted (required)
crosscompute: 0.0.0

# name summarizes what your automation does
name: Automation X
# slug customizes the automation uri
slug: automation-x
# title sets the page title
title: Automation X - Improve health, safety, quality of life
# description explains why your automation is useful
description: Improve health, safety, quality of life in our communities
# version should increment after you make changes to your automation
version: 0.0.0

# copyright declares who owns the rights to this work
copyright_name: CrossCompute
copyright_uri: https://crosscompute.com
copyright_year: 2023
attribution_text: >-
  [<img src="/assets/logo.svg" alt="{copyright_name}" loading="lazy">](
  {copyright_uri}) © {copyright_year}. Made with the [CrossCompute Analytics
  Software Development Kit](https://docs.crosscompute.com).

# imports let you embed other automations in this automation
imports:
  # id references this import in your templates when embedding;
  # path specifies the location of the automation file to import (required)
  - id: abc
    path: abc/automate.yml

# input is how your scripts get data from the user
input:

  # input variables are provided to your scripts from the user or from batches
  variables:
    # id references this variable in your templates (required);
    # view specifies how to render your variable (required);
    # path specifies the file where your scripts load this variable (required);
    #   note that path is relative to the input folder;
    #   specify ENVIRONMENT to prevent saving the variable to disk;
    # configuration customizes the look and feel of the view
    - id: town_name
      view: string
      path: variables.dictionary
      label: What is the name of your town?
      configuration:
        suggestions:
          - value: Springfield
          - value: Branson
          - value: Nixa
          - value: Mansfield
          - value: Independence
    - id: age
      view: number
      path: variables.dictionary
      label: What is your age?
    - id: secret_code
      view: password
      path: ENVIRONMENT
      label: What is your secret code?
    - id: support_email
      view: email
      path: ENVIRONMENT
    - id: problem_description
      view: text
      path: problem.txt
    - id: blurb
      view: markdown
      path: blurb.md
    - id: flavor
      view: radio
      path: variables.dictionary
      configuration:
        options:
          - name: Vanilla
            value: vanilla
          - name: Chocolate
            value: chocolate
          - name: Strawberry
            value: strawberry
    - id: topics
      view: checkbox
      path: variables.dictionary
      configuration:
        options:
          - value: cooking
          - value: reading
          - value: writing
          - value: mathematics
          - value: swimming
    - id: profile_photo
      view: file
      path: photo{index}{extension}
      configuration:
        mime-types:
          - image/png
          - image/jpeg
    - id: region
      view: map-mapbox-location
      path: variables.dictionary

  # input templates guide the user on how to specify the input variables
  templates:
    # path specifies the markdown file for your template (required)
    - path: input.md
    # expression determines whether your template shows next
    - path: input2.md
      expression: age >= 18

# output is how your scripts set data for the user
output:

  # output variables are provided by your scripts
  variables:
    # id references this variable in your templates (required);
    # view specifies how to render your variable (required);
    # path specifies the file where your scripts save this variable (required);
    #   note that path is relative to the output folder;
    # configuration customizes the look and feel of the view
    - id: document
      view: link
      path: document.pdf
      configuration:
        link-text: YOUR-LINK-TEXT
        file-name: YOUR-FILE-NAME
    - id: message
      view: string
      path: variables.dictionary
    - id: count
      view: number
      path: variables.dictionary
    - id: lyrics
      view: text
      path: lyrics.txt
    - id: monologue
      view: markdown
      path: monologue.md
    - id: logo
      view: image
      path: logo.svg
    - id: counts
      view: table
      path: counts.json
    - id: demo
      view: frame
      path: variables.dictionary
    - id: cards
      view: json
      path: cards.json
    - id: report
      view: pdf
      path: example.pdf
    - id: region
      view: map-mapbox
      path: region.geojson
      configuration:
        style: mapbox://styles/mapbox/dark-v10
        layers:
          - type: fill
            paint:
              fill-color: blue
          - type: circle
            paint:
              circle-color: red
    - id: incidents
      view: map-deck-screengrid
      path: incidents.json
      configuration:
        style: mapbox://styles/mapbox/dark-v10
    - id: identity
      view: barcode
      path: variables.dictionary

  # output templates guide the user on how to interpret the output variables
  templates:
    # path specifies the markdown file for your template (required)
    - path: output.md

# log is how your scripts communicate with the user while they are running
log:
  variables:
  templates:

# debug is how your scripts record information for troubleshooting bugs
debug:
  variables:
  templates:

# print defines how your output will render as a document or presentation
print:
  # print variables are generated by crosscompute printers
  variables:
    # id references this file in your templates (required);
    # view specifies how to render your file (required);
    # path specifies where the printer should save the file (required);
    # configuration customizes how the printer generates the file
    - id: report
      view: pdf
      path: report.pdf
      configuration:
        header-footer:
          font-family: sans-serif
          font-size: 8pt
          color: '#808080'
          padding: 0.1in 0.25in
          skip-first: true
        page-number:
          location: footer
          alignment: right
        name: '{y2 | slug}-{y3}.pdf'
    - id: report-uri
      view: link
      path: report.pdf
      label: Report URI
      configuration:
        path: report-uri.json

# batches are pre-defined runs with specific values set for each input variable
batches:

  # case 0:
  # folder sets values for input variables;
  # folder contains an input subfolder;
  # input subfolder contains files for the input variables
  - folder: batches/standard

  # case 1:
  # csv sets values for input variables, where each row is a separate batch;
  # folder is the name of the folder saved to disk;
  # name is the batch name displayed online;
  # slug is the batch uri;
  # the above string templates can include variable ids and filters
  - folder: batches/{x1 | slug}-{x2}
    name: '{x1 | title} {x2}'
    slug: '{x1 | slug}-{x2}'
    configuration:
      path: datasets/batches.csv

  # case 2:
  # reference folder sets default values for variables missing in the csv;
  # csv sets values for input variables, where each row is a separate batch
  - folder: batches/{x1 | slug}-{x2}
    name: '{x1 | title} {x2}'
    slug: '{x1 | slug}-{x2}'
    reference:
      folder: batches/standard
    configuration:
      path: datasets/batches.csv

# datasets are files that are expected by your scripts
datasets:
  # path specifies the location that your scripts should use to load the file;
  # reference path specifies the location of your actual file;
  # use reference paths to avoid changing the code in your scripts;
  # for example, suppose you have a report that relies on a monthly dataset;
  # use path to fix a location where your scripts can expect to find the file;
  # use reference path to point to the latest version of your monthly dataset
  - path: datasets/abc.csv
    reference:
      path: datasets/abc-2022.csv

# scripts contain code that turn input variables into output variables
scripts:
  # case 0:
  # command runs in the automation folder;
  # folder paths are passed as arguments
  - command: >
      python run.py
      {input_folder} {output_folder} {log_folder} {debug_folder}
  # case 1:
  # path is a python script that runs in the automation folder;
  # folder paths are passed as environment variables
  - path: run.py
  # case 2:
  # path is a python script that runs in the specified folder;
  # folder paths are passed as environment variables
  - path: run.py
    folder: scripts
  # case 3:
  # path is a jupyter notebook that runs in the automation folder;
  # folder paths are passed as environment variables
  - path: run.ipynb
  # case 4:
  # function is a python function that runs in the automation folder;
  # folder paths are passed as function arguments
  - function: run.plot_all

# environment configures how your scripts run
environment:

  # engine runs your scripts and can be either podman or unsafe;
  # podman is a container engine (see https://podman.io);
  # unsafe means that the scripts will run directly on your machine
  engine: podman

  # image is the container used to run your scripts when using podman engine
  image: python

  # packages are dependencies required by your scripts
  # engine=unsafe will install the packages directly on your machine
  # engine=podman will install the packages in the container image
  packages:
    # id is the name of the package as defined in the package manager
    # manager is the name of a package manager such as apt, dnf, npm, pip
    - id: matplotlib
      manager: pip

  # ports expose server processes running in your scripts
  ports:
    # id should correspond to a log or debug variable id that uses frame view;
    # number is the port on which your script server process is listening
    - id: demo
      number: 8888

  # variables are environment variables needed by your scripts
  variables:
    # id is the environment variable to make available to your script
    - id: GOOGLE_KEY

  # batch concurrency defines how your batches run;
  # batch thread runs each batch as a separate thread;
  # batch process runs each batch as a separate process;
  # batch single runs each batch one at a time
  batch: process

  # interval specifies how long to wait before running your scripts again;
  # use this setting to have dashboards update themselves;
  # add an exclamation point to ensure the scripts run even if nobody watches
  interval: 30 minutes

# display configures the overall look and feel of your automation
display:

  # styles customize how your templates look
  styles:
    # path specifies the location of a css file
    - path: style.css
    # uri specifies the uri of a css file
    - uri: https://cdn.jsdelivr.net/npm/pygments-css@1.0.0/default.css

  # templates override the core templates used to render the site
  templates:
    # id specifies the name of the template to override;
    # path specifies the location of a jinja template
    - id: base
      path: base.html
    - id: live
      path: live.html
    - id: root
      path: root.html

  # pages override the design of specific pages
  pages:
    # id specifies the name of the page to override;
    # configuration sets the design of the page
    - id: automation
      configuration:
        # design input puts the input template on the automation page
        design: input
    - id: automation
      configuration:
        # design output puts the output template on the automation page
        design: output
    - id: automation
      configuration:
        # design none only renders the list of batches on the automation page
        design: none
    - id: input
      configuration:
        # design none removes all variable labels and css
        design: none
    - id: output
      configuration:
        # design none removes all variable labels and css
        design: none

# buttons override the design of specific buttons
buttons:
  # id specifies the name of the button to override;
  # configuration sets the design of the button
  - id: continue
    configuration:
      button-text: Continuar
  - id: back
    configuration:
      button-text: Volver

# authorization restricts access to your automation
authorization:
  # tokens are api keys for your automation;
  # each token defines an identity
  tokens:
    # path specifies the location of a yaml file;
    # the file should have tokens as keys and configuration settings as values;
    # abcd:
    #   role_name: admin
    #   town_name: Springfield
    # bcde:
    #   role_name: leader
    #   town_name: Branson
    # cdef:
    #   role_name: member
    #   town_name: Mansfield
    - path: tokens.yml
  # groups define permissions
  groups:
    # configuration settings define how a group matches an identity
    # permission ids specify which privileges the identity can access
    - configuration:
        role_name: admin
      permissions:
        - id: add_token
        - id: see_root
        - id: see_automation
        - id: see_batch
        - id: run_automation
    # note that the value for each configuration setting can also be a list;
    # then an identity will match this group if its setting matches a value
    - configuration:
        role_name:
          - leader
          - member
      permissions:
        - id: see_root
        - id: see_automation
        - id: see_batch
          # action match is specific to the permission see_batch;
          # in the example above, suppose that a user uses the token cdef;
          # then the user will have town_name Mansfield and
          # can only see batches whose input variable town_name is Mansfield
          action: match
New Variable Views: json, pdf, file
view = json
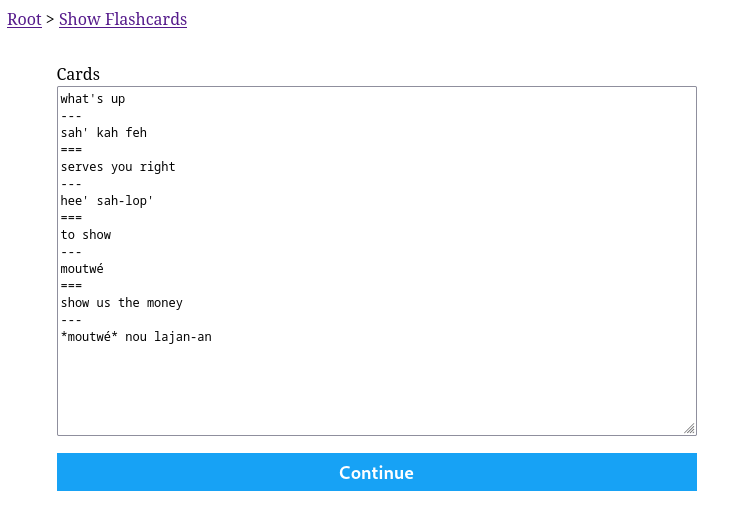
Use view = json if you want to access computed JSON directly in the log template or output template. See show-flashcards for an example. Try the show-flashcards app now.
# automate.yml

output:
  variables:
    - id: cards
      view: json
      path: cards.json
  templates:
    - path: output.md
scripts:
  - path: run.py
According to the configuration above, when your run.py script saves custom JSON in output_folder / 'cards.json', CrossCompute will notify connected clients that the cards variable has changed.
# run.py

import json
from os import getenv
from pathlib import Path

output_folder = Path(getenv(
    'CROSSCOMPUTE_OUTPUT_FOLDER', 'batches/standard/output'))

# ...

with (output_folder / 'cards.json').open('wt') as f:
    json.dump(cards, f)
Variables declared with view = json are available in a global variable called variables, from which you can access the variable json directly.
# output.md

<script>
async function showCards() {
  const { cards } = variables;
  // ...
}

let refreshInterval;
registerCallback('cards', function() {
  clearInterval(refreshInterval);
  refreshInterval = setInterval(showCards, 6000);
});
</script>
Use registerCallback to perform an action when the variable changes.
view = pdf
Use view = pdf to render PDFs in your templates. See merge-pdfs for an example.
output:
  variables:
    - id: c
      view: pdf
      path: c.pdf
    - id: document
      view: link
      path: c.pdf
Add a corresponding view = link variable to add a download link to your PDF document.
view = file
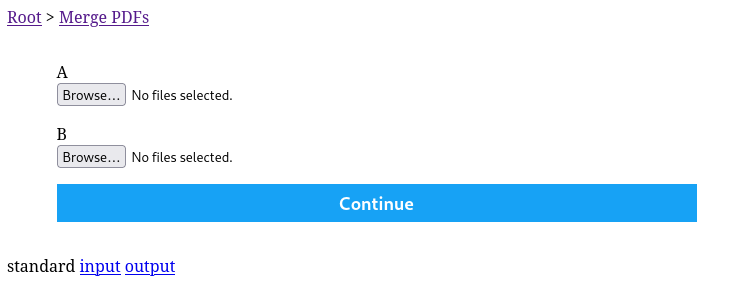
Use view = file to accept file uploads in your automations. See merge-pdfs for an example. Try the merge-pdfs app now.
input:
  variables:
    - id: a
      view: file
      path: a.pdf
      configuration:
        mime-types:
          - application/pdf
You can specify which file types your app wants by setting the mime-types configuration option.
Live Print Preview
You can now see your PDF reports update in real-time after you save changes to your configurations, scripts, templates and styles. This is particularly handy during the later stages of the report automation process, when adding cover images and proofreading details. See randomize-histograms for an example. Try live print preview now.
Define print variables to activate live print preview in the development server, as shown in the configuration below. You may also need to install dependencies as described in the crosscompute-printers-pdf README.
# automate.yml

print:
  variables:
    - id: report
      view: pdf
      path: report.pdf
      configuration:
        header-footer:
          font-family: sans-serif
          font-size: 8pt
          color: '#808080'
          padding: 0.1in 0.25in
          skip-first: true
        page-number:
          location: footer
          alignment: right
        name: me{mean}-va{variance}-vc{value_count}-bc{bin_count}.pdf
    - id: report-uri
      view: link
      path: report.pdf
      label: Report URI
      configuration:
        path: report-uri.json
Include a view = link print variable to add a download link to your report that is updated with its batch specific rendered filename.
Conditional Templates
We have added preliminary support for conditional templates. See conditional-templates for an example. With conditional templates, you can now make choose-your-own-adventure style step-by-step wizard interfaces, where user input decides which templates to show next. We decided on a declarative expression approach to avoid spaghetti routing.
input:
  variables:
    - id: age
      view: number
      path: variables.dictionary
    - id: hour
      view: number
      path: variables.dictionary
  templates:
    - path: input.md
    - path: input-child.md
      expression: age < 18
    - path: input-adult.md
      expression: age >= 18
    - path: input-morning-child.md
      expression: age < 18 && hour <= 12
    - path: input-morning-adult.md
      expression: age >= 18 && hour <= 12
    - path: input-afternoon-child.md
      expression: age < 18 && hour > 12
    - path: input-afternoon-adult.md
      expression: age >= 18 && hour > 12
Conditional templates are intended for simple client-side logic. For more complex logic that includes external API calls, you will need to separate the screens into two separate automations. Try estimate-critical-loads for an example of complex logic.
Server Side Events
We made careful design decisions to make sure apps designed using CrossCompute load quickly even under low bandwidth conditions such as 3G internet. With CrossCompute 0.9.4, we replaced long polling with server side events to further conserve your mobile battery. This was made possible in a single server package by the transition from pyramid to fastapi.
Migration Guide
CrossCompute Version 0.9.3 to 0.9.4
# OLD
crosscompute: 0.9.3

# NEW
crosscompute: 0.9.4
Datasets Reference URL to URI
# OLD
datasets:
  - path: datasets/cell-towers.csv
    reference:
      url: https://example.com/x.csv

# NEW
datasets:
  - path: datasets/cell-towers.csv
    reference:
      uri: https://example.com/x.csv
Prints to Print
# OLD
prints:
  - format: pdf
    configuration:
        header-footer:
          font-family: sans-serif
          font-size: 8pt
          color: '#808080'
          padding: 0.1in 0.25in
          skip-first: true
        page-number:
          location: footer
          alignment: right
    folder: ~/Documents/attachments/randomize-histograms-{timestamp}
    name: me{mean}-va{variance}-vc{value_count}-bc{bin_count}.pdf

# NEW
print:
  variables:
    - id: report
      view: pdf
      path: report.pdf
      configuration:
        header-footer:
          font-family: sans-serif
          font-size: 8pt
          color: '#808080'
          padding: 0.1in 0.25in
          skip-first: true
        page-number:
          location: footer
          alignment: right
        name: me{mean}-va{variance}-vc{value_count}-bc{bin_count}.pdf
    - id: report-uri
      view: link
      path: report.pdf
      label: Report URI
      configuration:
        path: report-uri.json