The automate.yml file is the cornerstone of the CrossCompute Framework, serving as the blueprint for transforming your script into a dynamic and versatile tool. It’s like a detailed instruction manual, telling CrossCompute exactly how to process inputs, generate outputs, and manage batches of data efficiently. This article provides an overview of the main components of the automate.yml file.
The automate.yml file is divided into several key sections, each serving a distinct purpose. Let’s break down these sections and explore the various views available for use.
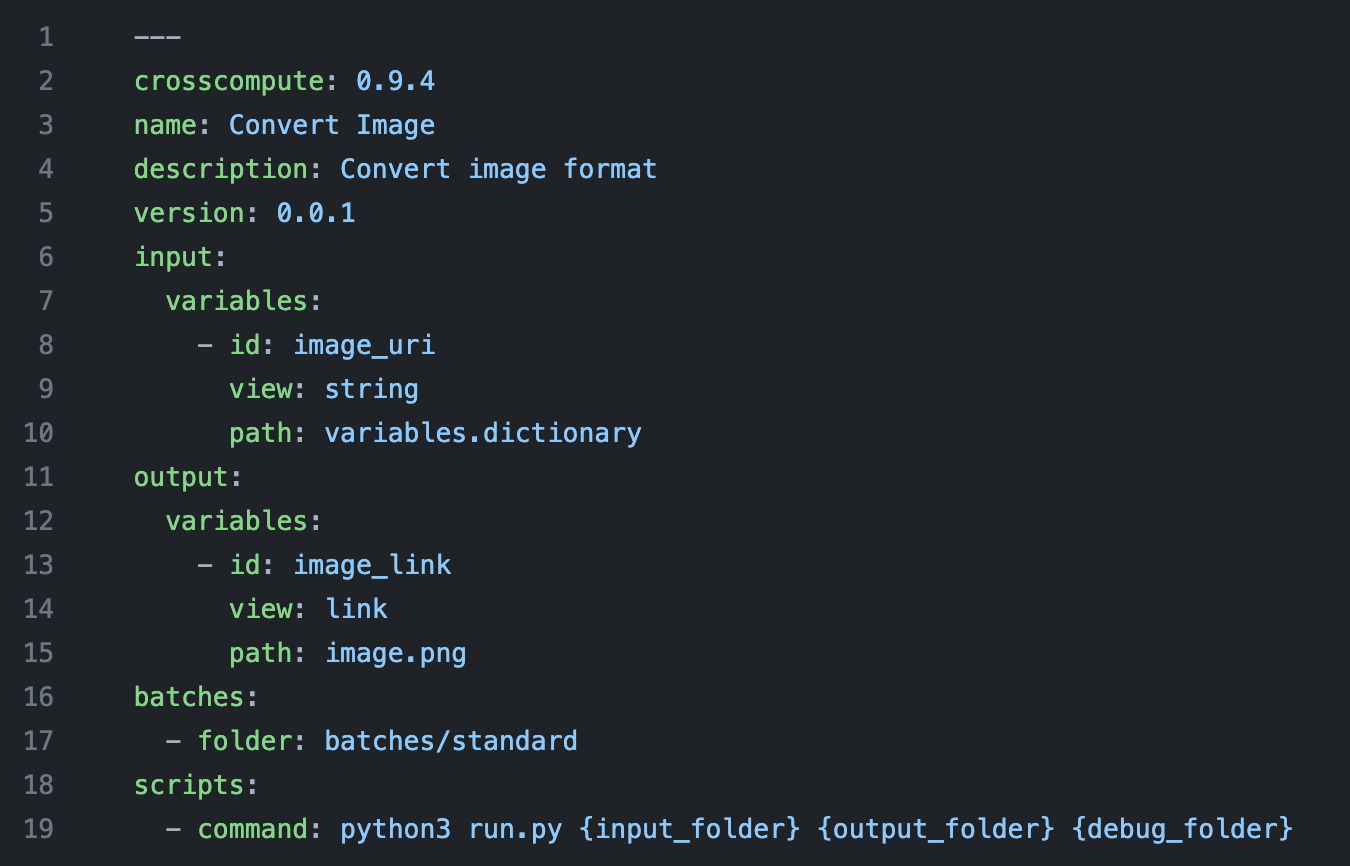
Header Section
Our config file begins with the header section where we specify the version of crosscompute, the name of your tool, a description for your tool as well as its version number.
Input Section
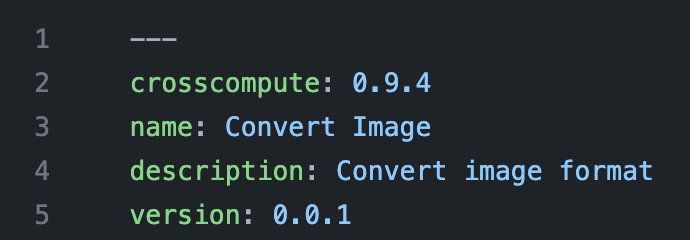
The purpose of this section is for us to define what inputs the tool will accept and how these inputs are presented in the form.
The Input Section defines the inputs accepted by the tool and their presentation in the form. For example, as shown above, it requires the image’s uniform resource identifier as a string input. This is defined in the automate.yml file under input: followed by variables:. Each variable, such as image_uri, has an id, a view for form rendering, and a path which defines the location of the data structure where the variable is stored.
Output Section
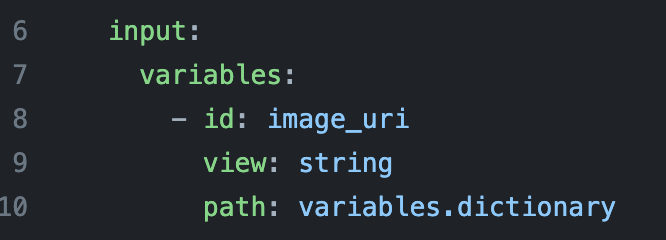
This section is similar to the input section but defines the outputs that the tool will generate and their presentation.
In the image above, we see that our tool has an output variable identified as image_link. This output variable will be saved to the project’s folder as image.png. Finally, to the user the output will be rendered and presented as a link.
Batches Section
![]()
The Batches Section in the automate.yml file enhances efficiency by utilizing predefined input values. These predefined values are stored in designated subfolders within the batches folder of your project. Each subfolder corresponds to a specific set of input parameters.
For example, in our Convert Image tool, which adjusts image aspect ratios for various uses, you would create specific subfolders for different social media platforms. The batches/facebook subfolder contains files with predefined aspect ratios suitable for Facebook, while batches/instagram and batches/twitter have their unique configurations for Instagram and Twitter respectively. By setting up these folders with the necessary input values, the tool can automatically apply the correct dimensions for each platform, streamlining the image conversion process.
Scripts Section

Finally, in the script section of our automate.yml file we define the command attribute which specifies the paths to the script that process the input values to produce the desired output.
In the image above, the Scripts Section specifies the execution command for processing inputs. It includes the command attribute, which in the example directs python3 to run run.py with the provided arguments: {input_folder}, {output_folder}, and {debug_folder}.
Summary
In conclusion, the automate.yml file is the heart of any tool created with the CrossCompute Framework. Understanding its structure and how to effectively configure it ensures that your tool performs efficiently, meeting both the basic and advanced needs of your application.